
Quickstart: Unity
Forge talks to the Unity Editor over TCP. A small UPM package (the Forge Unity Bridge) runs an in-Editor TCP server, and Forge connects as a client to read the scene, stream the console, and apply changes wrapped in Unity’s Undo.
This page walks you through getting that connection up.
Prerequisites
Section titled “Prerequisites”- Unity 2022 LTS or Unity 6 installed via Unity Hub.
- A Unity project that has been opened in the Editor at least once. (Forge needs
Assets/andProjectSettings/ProjectVersion.txtto detect the project.)
1. Open the project in Forge
Section titled “1. Open the project in Forge”In Forge, click the mode dropdown (top-left of the title bar) and choose Open project. Pick the root of your Unity project.
Forge detects Unity automatically. Two things change:
- A Unity pill appears in the title bar with the detected Editor version.
- The Inspector panel grows two extra tabs (Hierarchy and Console). Both are empty until the bridge connects.
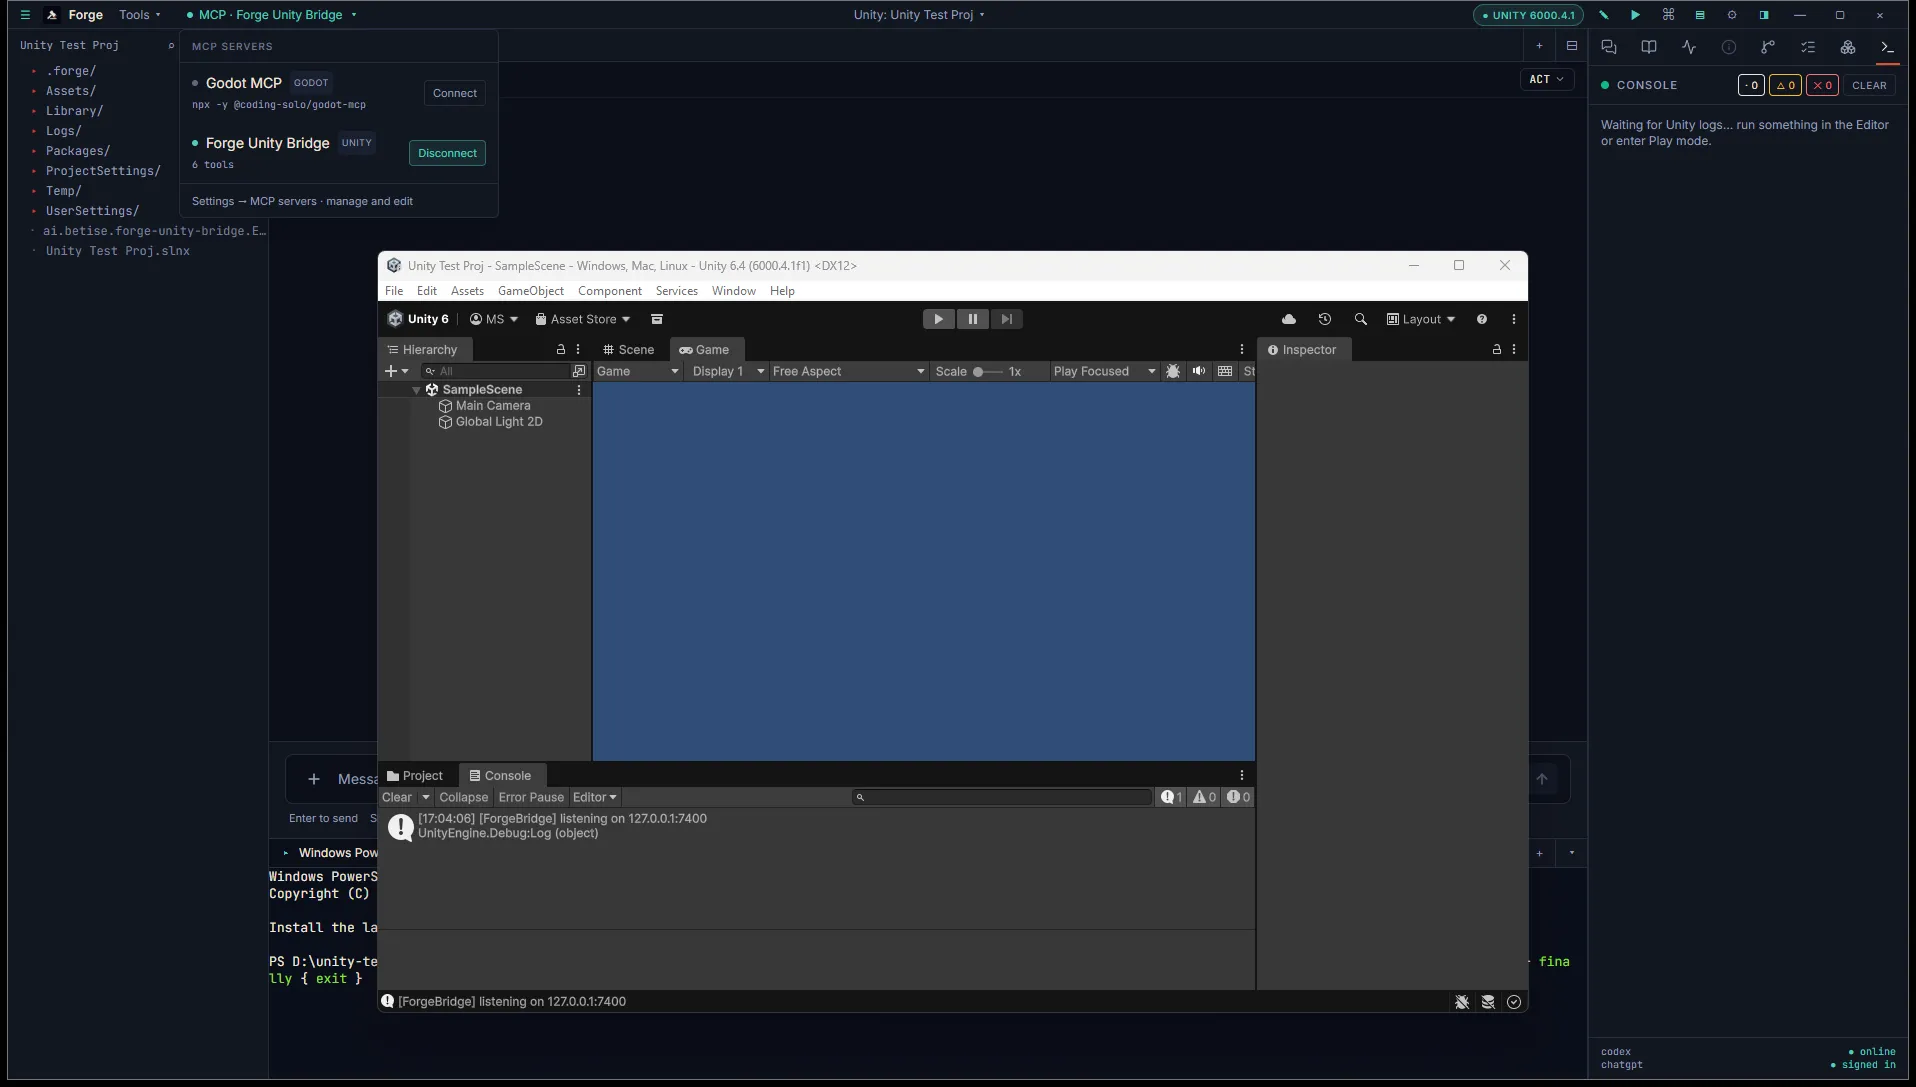
2. Install the bridge
Section titled “2. Install the bridge”Open Settings → MCP. Scroll to the Forge Unity Bridge field (only visible when you’re in a Unity project). Click Install bridge.
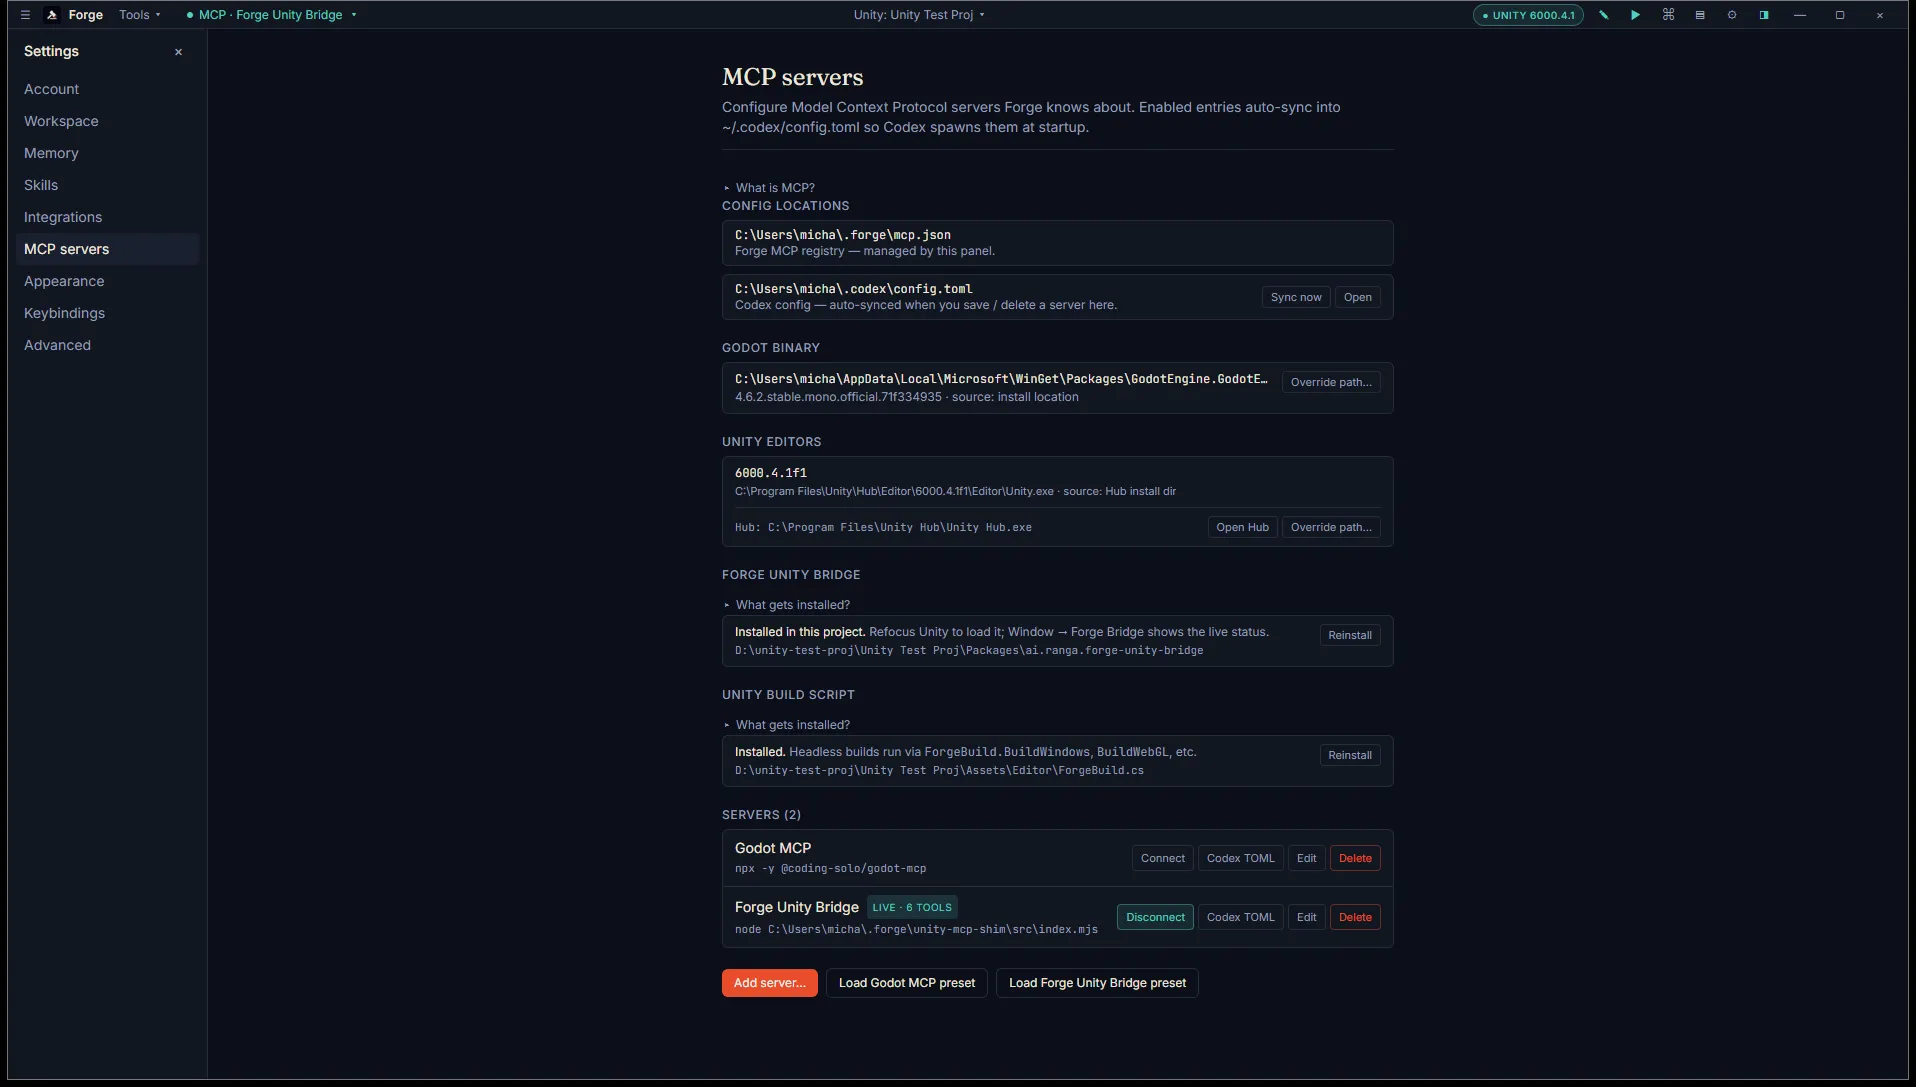
This drops a UPM package into your project at Packages/ai.ranga.forge-unity-bridge/. It’s a small set of editor scripts. Nothing runs in player builds.
3. Let Unity pick it up
Section titled “3. Let Unity pick it up”Switch to the Unity Editor window. On focus, Unity refreshes its package list and compiles the bridge. You’ll see a one-time progress bar.
Once compiled, the bridge starts a TCP server on port 7400. The first time it runs, it also flips two project settings under Edit → Project Settings → Editor: Enter Play Mode Options → Disable Domain Reload and Disable Scene Reload. This is required for the bridge to survive Unity’s Play boundary without crashing. You can revert it from the bridge config if you’d rather.
4. Confirm the connection
Section titled “4. Confirm the connection”Switch back to Forge. The Unity pill in the title bar should turn green and show Connected. If it stays grey, see Connect Unity bridge for troubleshooting.
Open the Hierarchy tab in the Inspector. It should show the active scene’s GameObjects in a tree. Click any node and Unity selects it in the Editor.
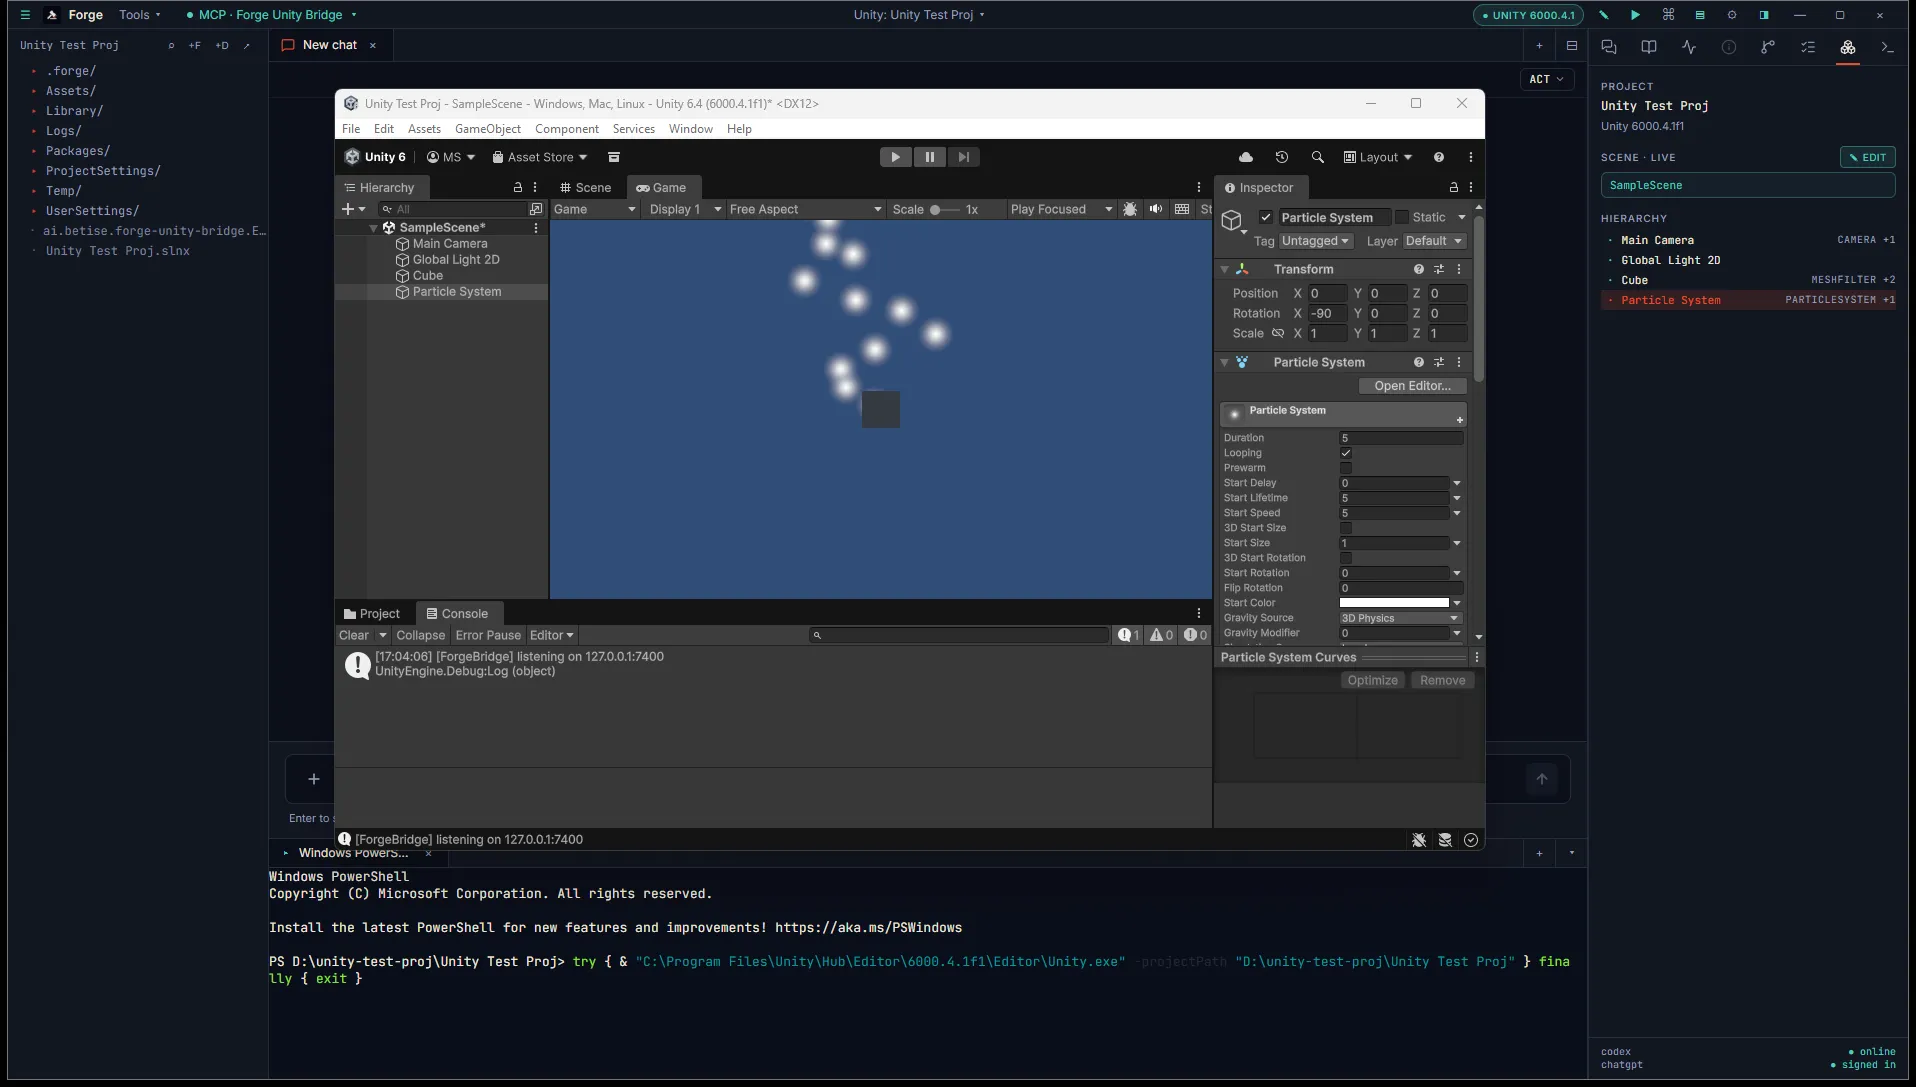
Open the Console tab. New Debug.Log calls stream in live.
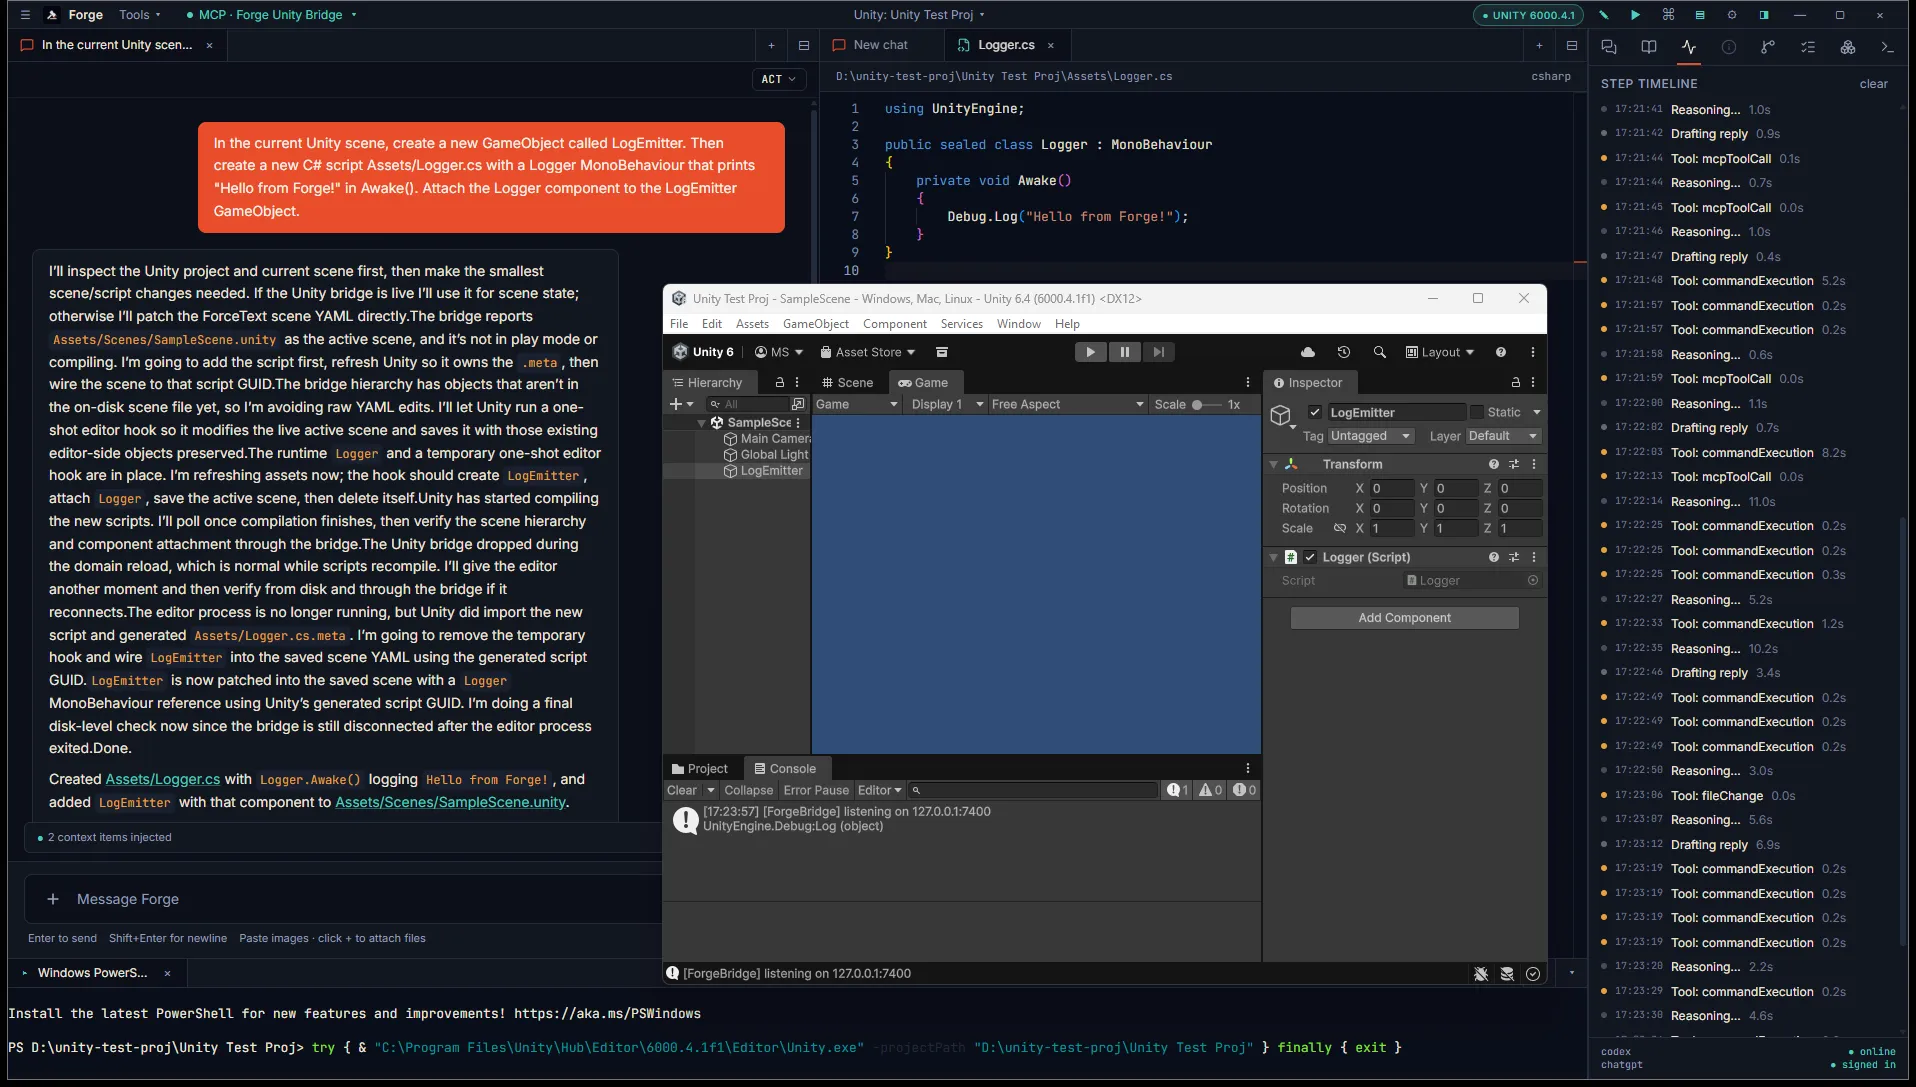
5. Try a write
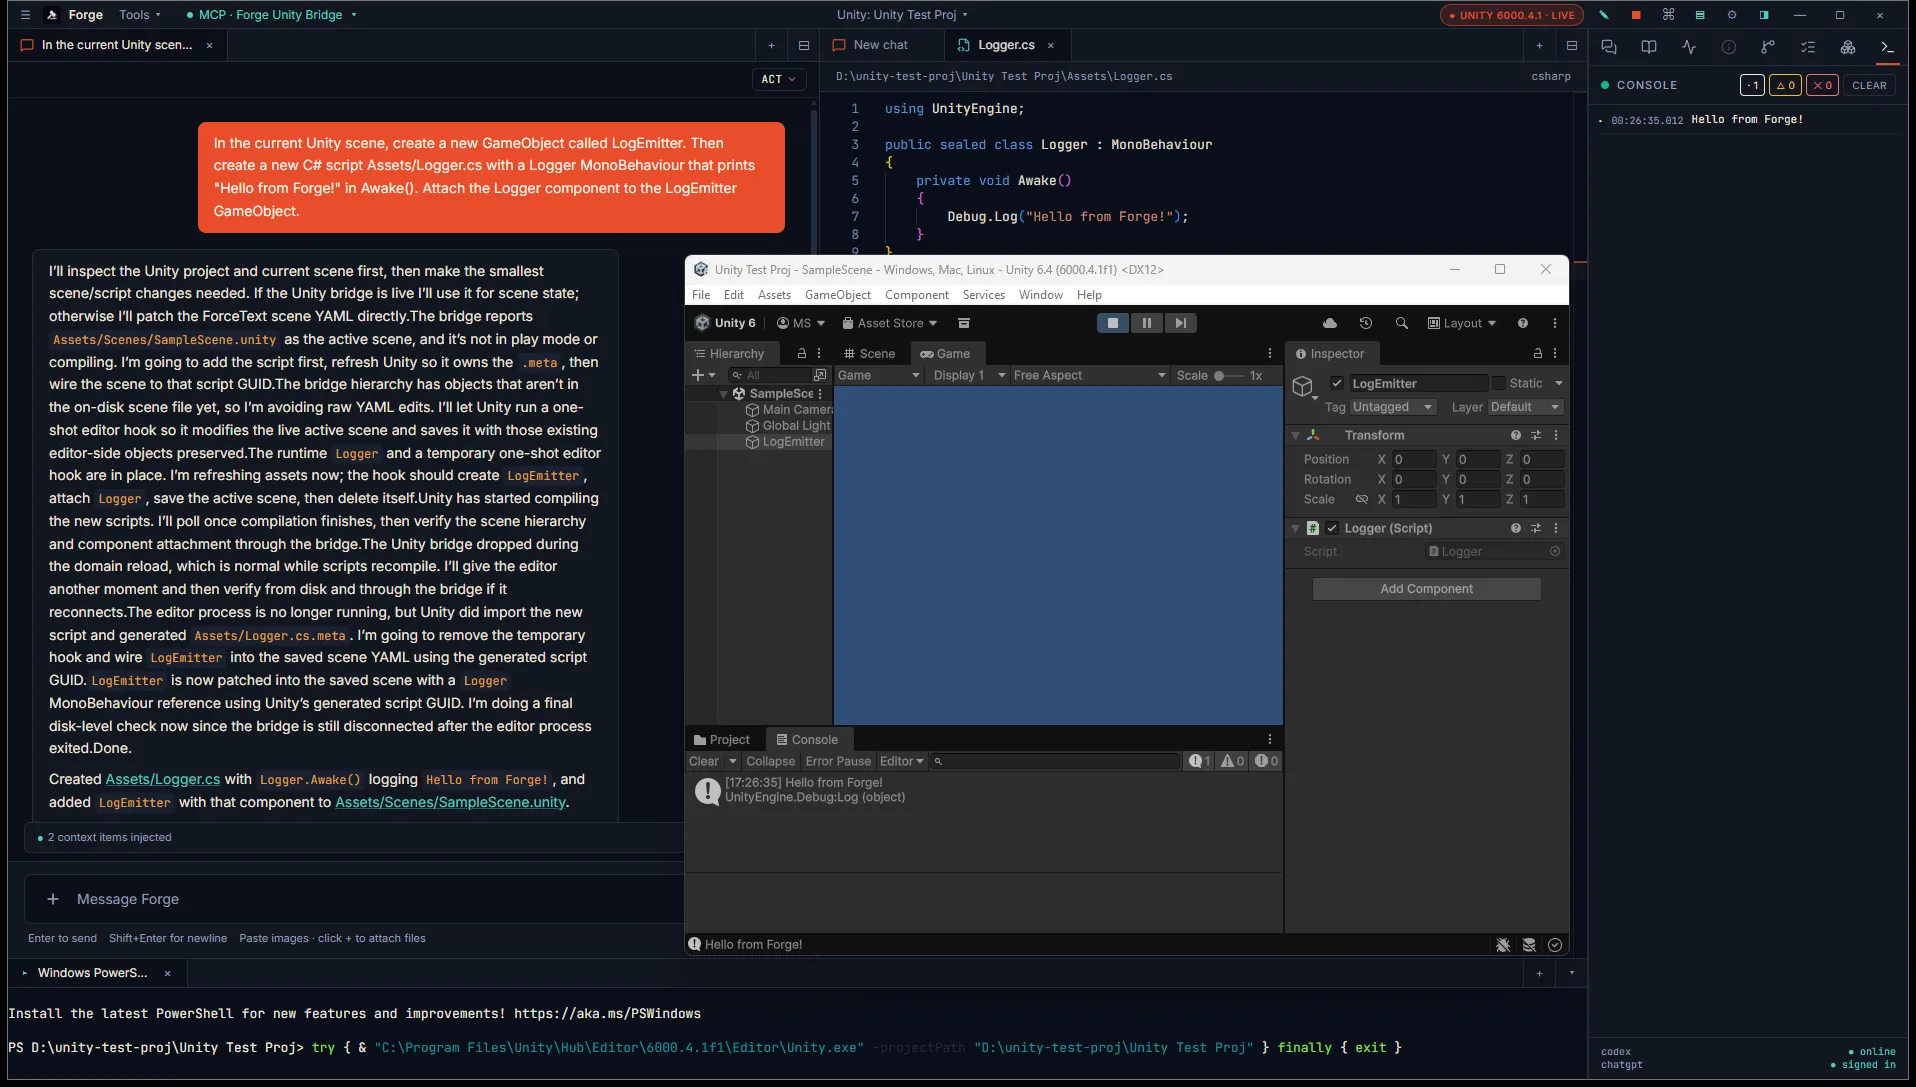
Section titled “5. Try a write”Ask the agent in chat:
In the current Unity scene, create a new GameObject called LogEmitter. Then create a new C# script
Assets/Logger.cswith a Logger MonoBehaviour that prints “Hello from Forge!” in Awake(). Attach the Logger component to the LogEmitter GameObject.
The agent writes Logger.cs as a diff-card proposal, calls refresh_assets so Unity picks it up, and lays out the GameObject + component edits to your scene. Approve the diffs, hit Play in Unity, and the log line streams back into Forge’s Console.
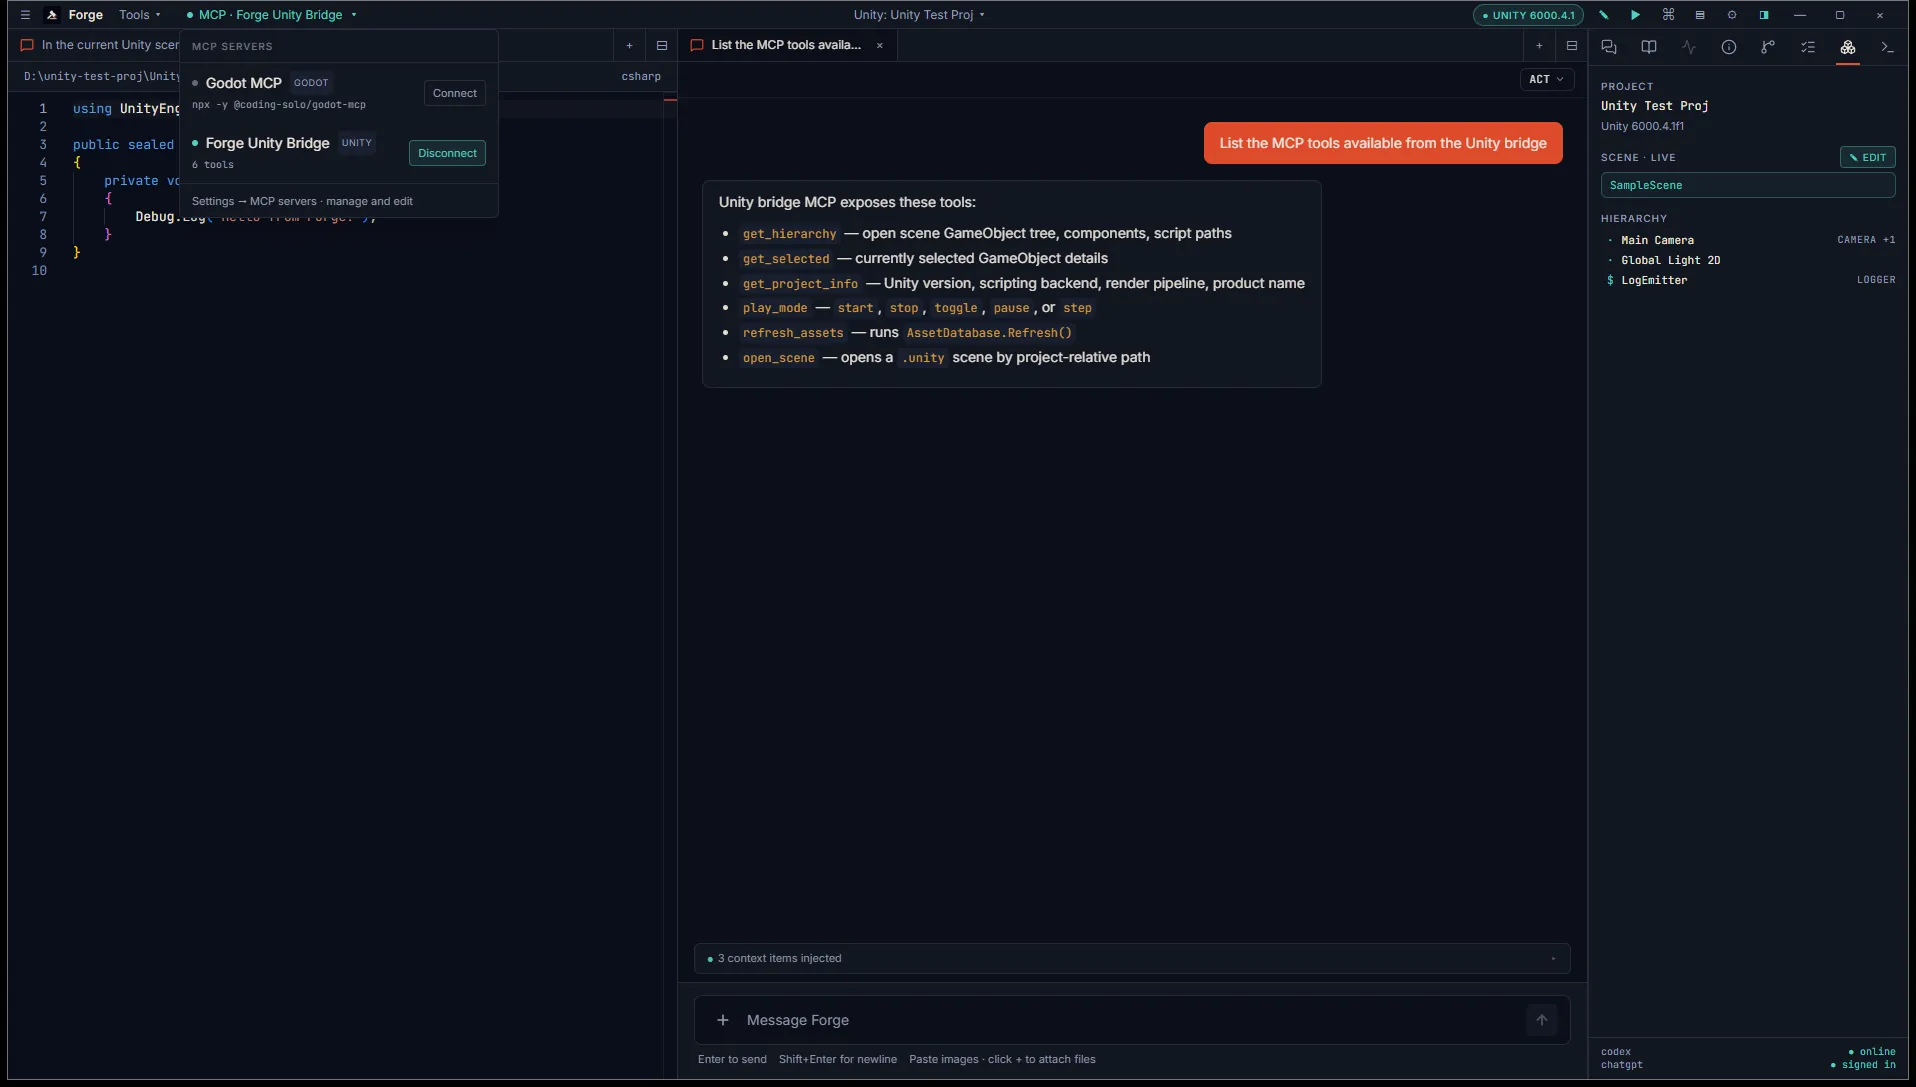
Want a deeper look at what the bridge can do? Ask the agent:
List the MCP tools available from the Unity bridge.
What’s next
Section titled “What’s next”- Unity bridge: read tools lists every read-only tool the agent can call.
- Unity bridge: write tools covers Forge’s GameObject and component edits.
- Unity build mode installs
Assets/Editor/ForgeBuild.csfor headless builds.